Project Flite Module: The Sparrow's Egg

Author: Flite Test STEM
Learning Strand: Ft Workbench
Level: All School Levels
Length: 5 hours. Beginners guide to implementing an FT STEM Lesson for UE, MS and HS.
Standards Addressed:

ISTE Standards of Creativity and Innovation
Communication and Collaboration
Research and Information Fluency
Critical Thinking, Problem Solving, and Decision Making
Digital Citizenship
Technology Operations and Concepts
Next Generation Science Standards
ETS 1A: Defining and Delimiting and Engineering Problem
ETS 1B: Developing Possible Solutions
ETS 1C: Optimizing the Design Solution
INDEX
Objectives
STUDENT WILL
- Understand the basic usage of the Flite Test engineering
and design process
- Practice the process through a simulated problem
- Understand the basics of flight
- Work in teams and collaborate on designs
At Home Learning Suggested Schedules
Elementary
- 1/2 hour a day, five days a week for 3-4 weeks
- 1/2 hour a day, 2-3 days a week for 4-6 weeks
- 60 minutes a day for 2 weeks
Middle School/High School
- 45-60 minutes a day, five days a week for 1-2 weeks
- 45-60 minutes a day, 2-3 days a week for 2-3 weeks
- 60-90 minutes a day for 1 week
Materials Needed
FT Sparrow (See Store For Options)

TOOLS
All the tools you need for this build are included in FT Crafty Kits. (See Store For Options)

A FEW CARTONS of STANDARD EGGS

OPTIONAL
The following are possible materials needed for Egg Caring Mechanism:
- FT Foam Board (See Store For Options) or use extra foam board from FT Sparrow kit packaging.
- Cardboard
- Cotton balls
- Bubble Wrap
- Straws

Hot Glue Gun and hot glue sticks
IMPORTANT SAFETY NOTE REGARDING HOT GLUE: Hot Glue Guns get extremely hot, and should always be handled with care. Young students should always be supervised when using hot glue. Review hot glue safety with your students prior to using hot glue guns.
Utility Knives (if you are working with younger kids, you can use plastic cards instead of knives
FREE SPARROW PLANS
FT Mighty Mini Sparrow (Full Plans)
FT Might Mini Sparrow (Tiled Plans)
FT Might Mini Sparrow (All in one)
Summary
Activity
Step 1
INTRO
Explain the Flite Test engineering and design process. This
process has four stages: Research, Design, Create and Test. Engineers use this
process to solve problems, and this is the process students will use to
complete this project.
The diagram below illustrates the stages of the design process.
See attached Resources for download and printing of the basic FT EDM

Step 2
RESEARCH
Instruct students to create an on board attachment for the FT Sparrow glider that can safely transport an egg 20 feet when hand tossed.
Tell students to research possible attachment designs and
make a list of ideas to try. Suggest that students search FliteTest.com,
YouTube or Google for inspiration.
Step 3
DESIGN
Students should now use what they learned from the Research
stage to create a design. Instruct them to sketch out a few possible solutions
on scratch paper.
Step 4
CREATE STAGE 1
In this stage, students will build their FT Sparrow glider. Complete the following steps to build the gliders, and watch the Build video for reference:

The FT Sparrow wing has three pieces: the main piece and two small spars. Glue the spars down on the wing.
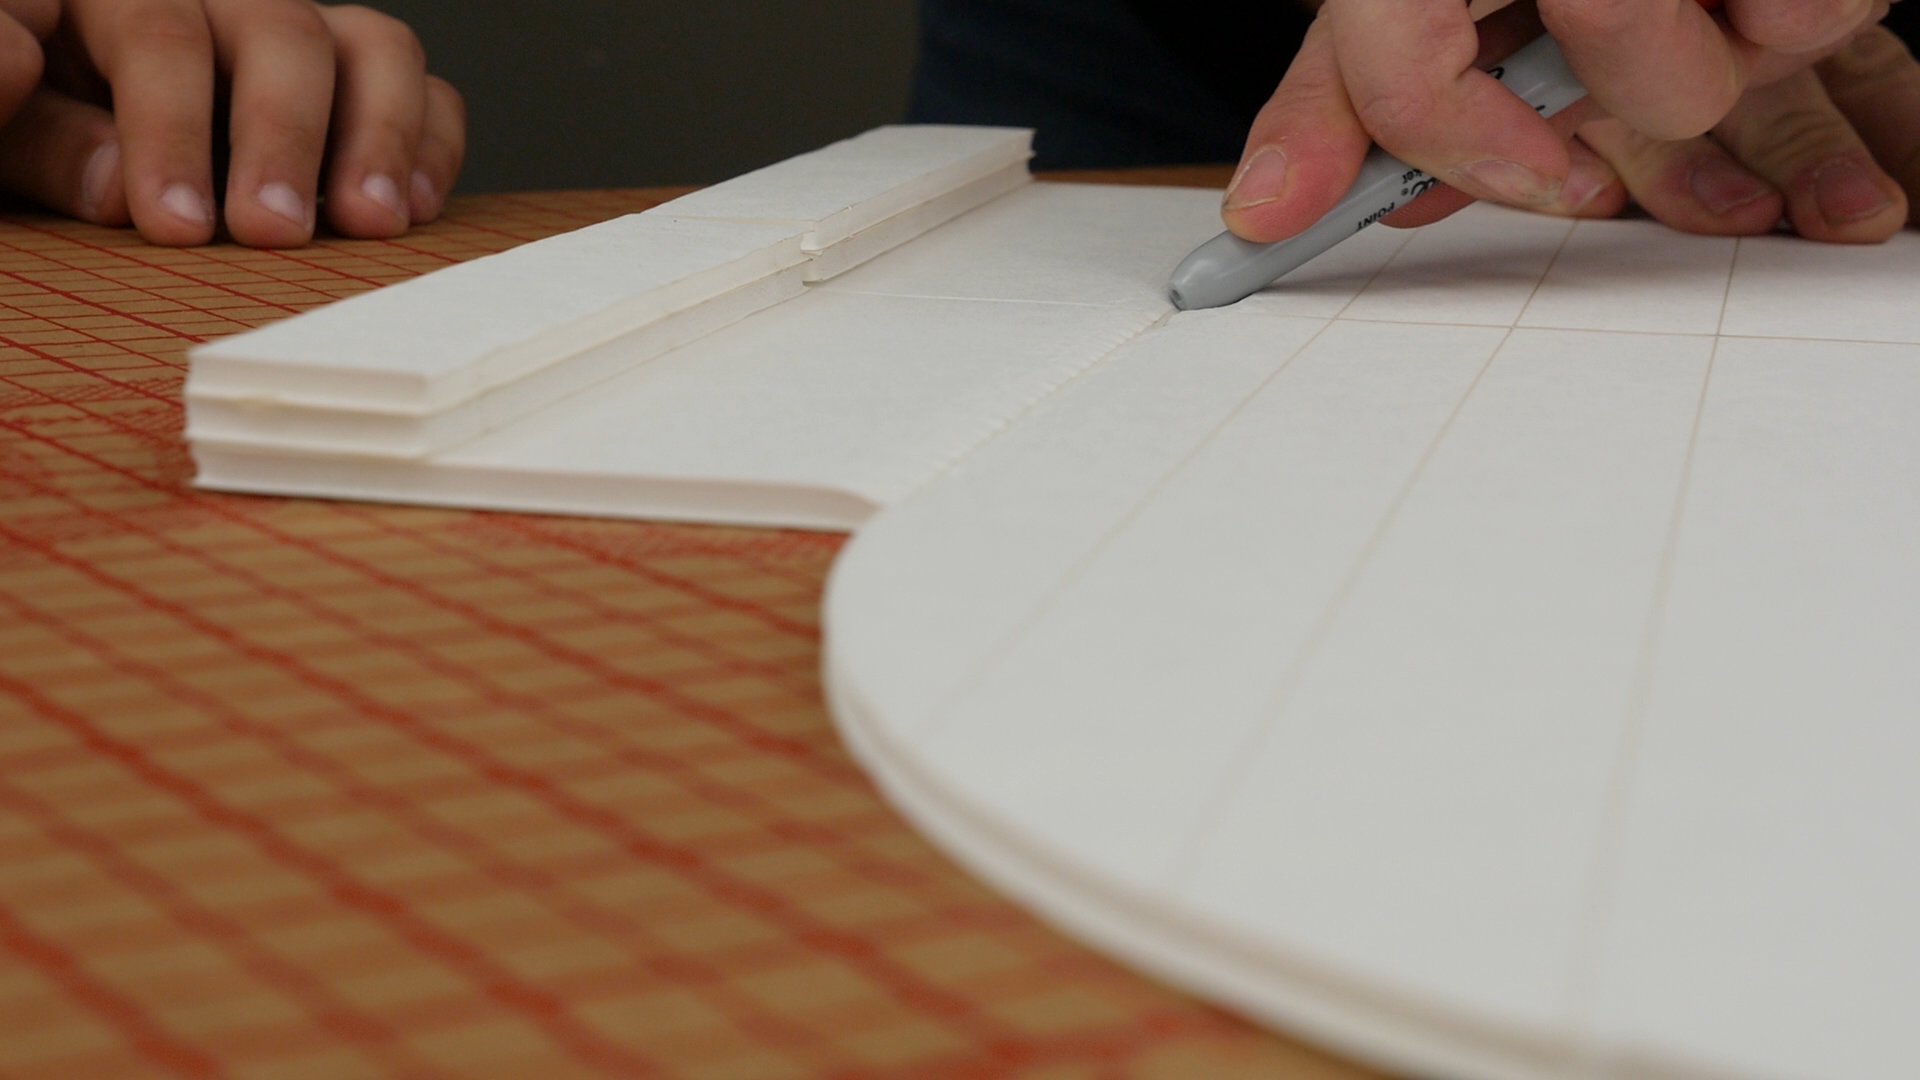
Use a marker to make a double bevel cut, fold the wing over and glue it down.
Don’t forget to reinforce the seams with glue!

Use the dihedral gauge while you put glue in the center seam of the wing. Once that dries, reinforce the seam with tape to make the wing shape nice and strong.
If there is too much glue in the seams, remove it to keep excess weight off the plane.

Follow the score lines on the fuselage using a gift card. Use your fingernails to remove the excess foam.
Remove the paper from the foam board that will be curved around the nose, then use glue to secure the nose doublers.

Use a B fold on the sides of the fuselage and glue them down. Try to keep the sides as close to a 90 degree angle as possible.
Glue the tail portion of the fuselage together.

Wrap the foam around the bottom of the nose and secure it with glue. After that dries, crack the seam on the hatch and glue down the portion that meets the front of the nose.
Reinforce the nose and hatch using glue. Then pop out the tabs on the bottom side of the fuselage.

Use glue to attach the skid to the bottom of the fuselage.
Pop out the thrower hole, and use a marker to smooth the edges.

Tape the two tail pieces together on one side to make the V wing. Peel off the excess tape.
Use a marker to crush the center edge. Put glue down the center and use the triangle gauge to hold the shape as it dries.

Install the tail to the back of the fuselage. If the tail isn’t flesh against the reference lines, use your marker to increase the angle of the foam inside the fuselage. Glue the tail to the fuselage, making sure the tail matches the reference lines.
Use a barbecue skewer to open up the reference holes in the fuselage and tail, and slide the skewer through. Cut away the excess, leaving a centimeter on either side.

Insert the cut-down skewer into the tail. Loop two rubber bands on the skewer before pulling it through the other side.
Pass the skewer through the nose. Leave about a thumb’s length on both sides of the nose and cut off any excess skewer.
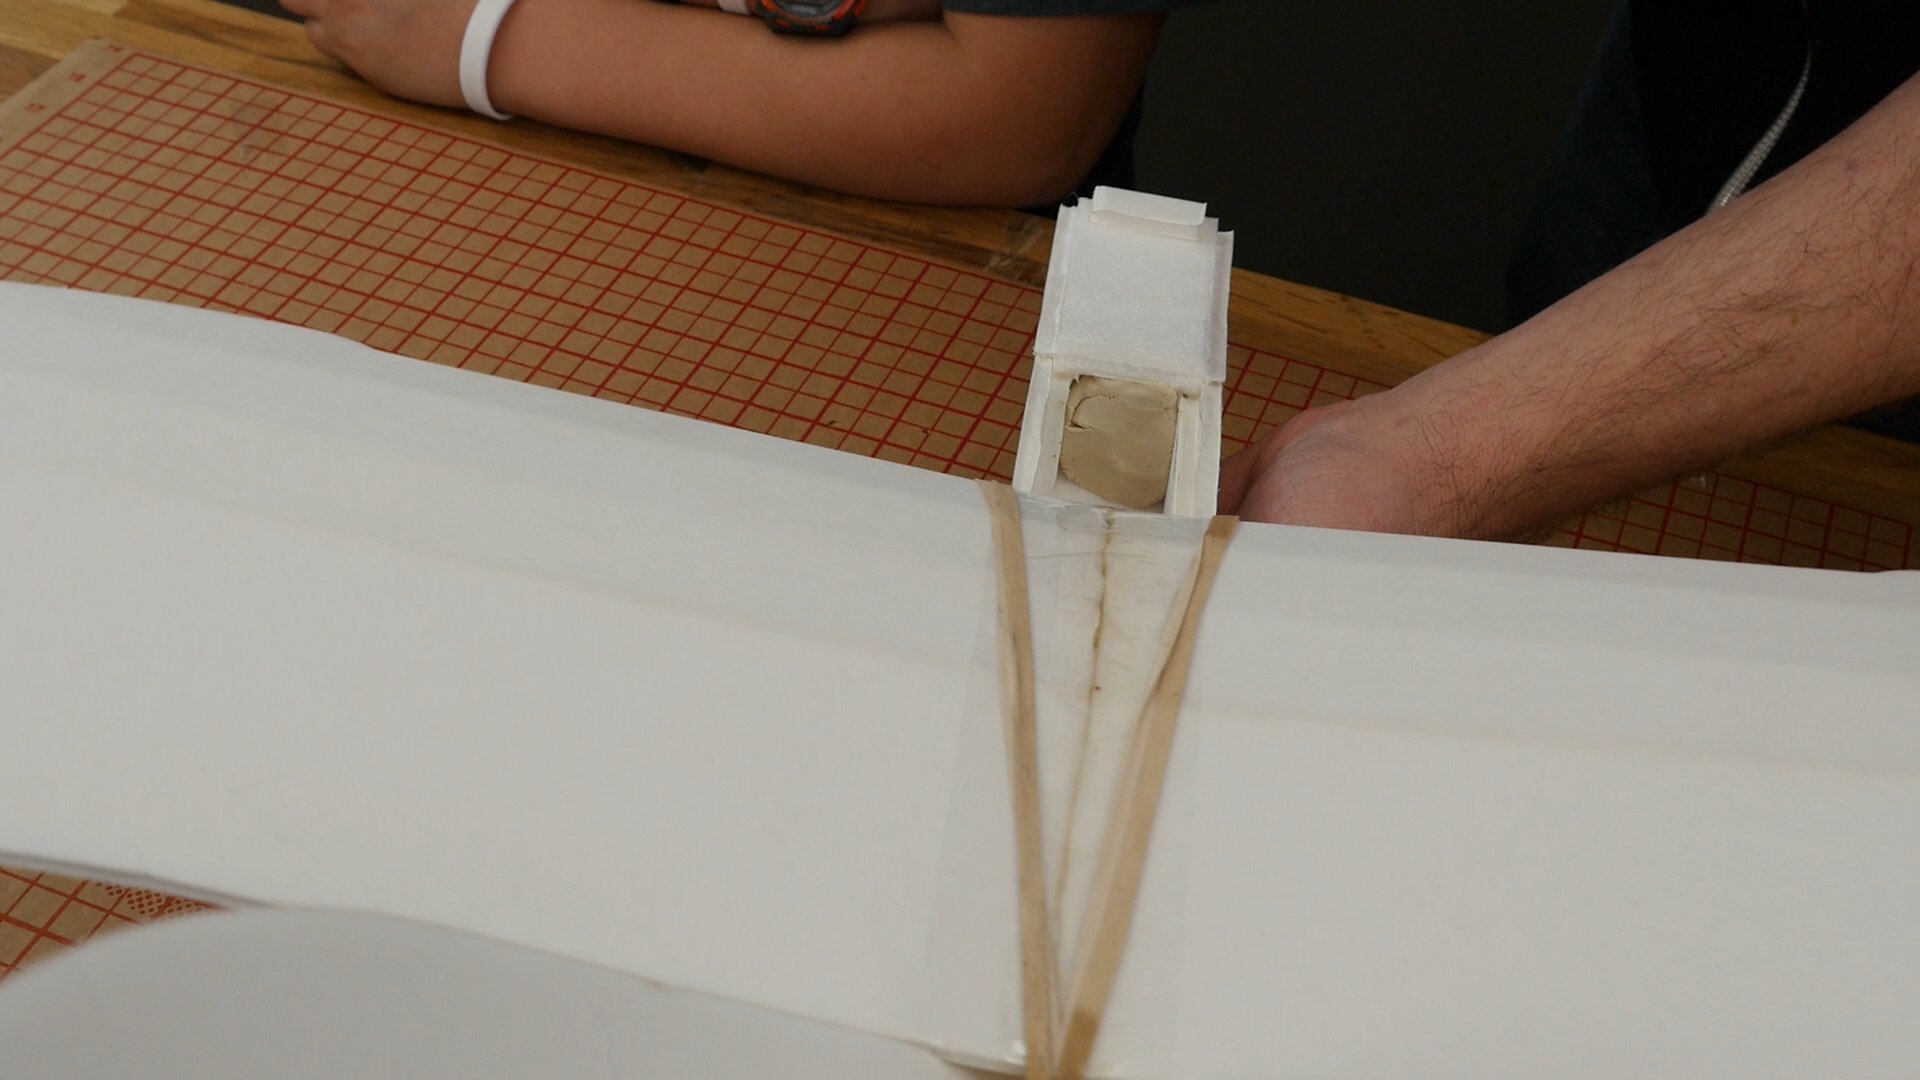
Place the wing on top of the fuselage, and secure the rubber bands to the skewer on the side of the nose.
Add clay to the front nose until the plane is balanced.
Lightly lift up both sides of the elevator to give it about a millimeter of deflection on both sides.

You've now completed the free flight glider version of the FT Mighty Mini Sparrow. Move onto Step 5 to create your egg Mechanism
Step 5
CREATE STAGE 2
Once their gliders are built, students should use foam board and the tools provided to create their egg-carrying mechanisms they designed and attach them to the planes.
NOTE: Make sure to have the students keep in mind the Center of Gravity of their FT Sparrow. Their egg-carrying mechanism will need to be designed and placed properly on the aircraft to make sure its glide slope is correct. See reference below;

Step 6
TEST
Set up a safe area to test the planes. Move any objects that could obstruct flight out of the way, and keep students behind the launch line. Mark a spot 20-feet away from where students will toss their planes, and let the testing begin!
Set a basic testing scenarios for students;
- Sparrow must exceed 30 feet while not breaking the egg.
- Longest distance test before breaking the egg.
After the students have all tested their gliders, ask them
to write a brief summary of their project. Students should talk about how far
their glider traveled, whether their egg was still in tact, and ideas for
changing their attachment designs to prevent the egg from breaking.
Step 7
EXTENDED LEARNING
Ready to take on your grade level FT EDM online? Using the students Hangar, have them document their process through the FT EDM online tool (see video tutorial below) solving the following problem using the students already created FT Sparrow!
Problem to Solve: Without adjusting the FT Sparrow's fuselage, redesign the main wing and back stabilizers to accommodate longer flight times while still supporting your engineered egg support mechanism.
You're done!


