Building Your Gremlin

Author: Flite Test STEM
Learning Strand: Built To Fly
Level: All School Levels
Length: 1 hours. Lesson focused on the building of the FT Gremlin Mini Quad using Power Pack G components.
Standards Addressed:

INTERNATIONAL SOCIETY FOR TECHNOLOGY IN EDUCATION
- Technology Operations and Concepts
- Critical Thinking and Problem Solving
- Creativity and Innovation
NATIONAL COUNCIL OF TEACHER MATHEMATICS STANDARDS
- Measurement
INDEX
- OBJECTIVES
- MATERIALS NEEDED
- SUMMARY
- ACTIVITY
Objectives
STUDENTS WIll
- Understand the FT Gremlin components by building the quad to specifications.
Materials Needed
POWER PACK
FT Gremlin Power Pack Plus Kit (See Store For Options)
NOTE: This lesson doesn't require the use of the Power Pack, however, have visuals to make those component connections with the students would be helpful

WORKSHEETS
Get 2 Know Your Gremlin Worksheet for reference purposes only.
NOTE: See Get 2 Know Your Gremlin Lesson for details.


Summary
Activity
BUILDING YOUR GREMLIN
Teachers and students, please follow our awesome multirotor guy TJ in how to build your very own FT Gremlin.
Boot and Flash your F3 Femto Flight Controller, see video for instructions.


Acquire your favorite Gremlin frame.

Tin all of your soldering points, see video for points.

Prep your ESCs, see video for prepping tips.

The ESC prepping along with the main power connection is complete and looks similar to this.

Let's begin prepping the motor layout and wire organizing.

Once the motors are all done, it is time to solder on the satellite receiver, here is the configuration for a DSMX Spektrum Satellite Receiver.

Once you have the receiver complete, if you want to, solder on the Hyperion camera!

Mount the camera securely and angle to your preference, if you are a beginner, go 0 degrees, increase the angle as your skills get better!

Finish the Gremlin by mounting the motors and the top frame, don't forget to secure your ESCs and wires.

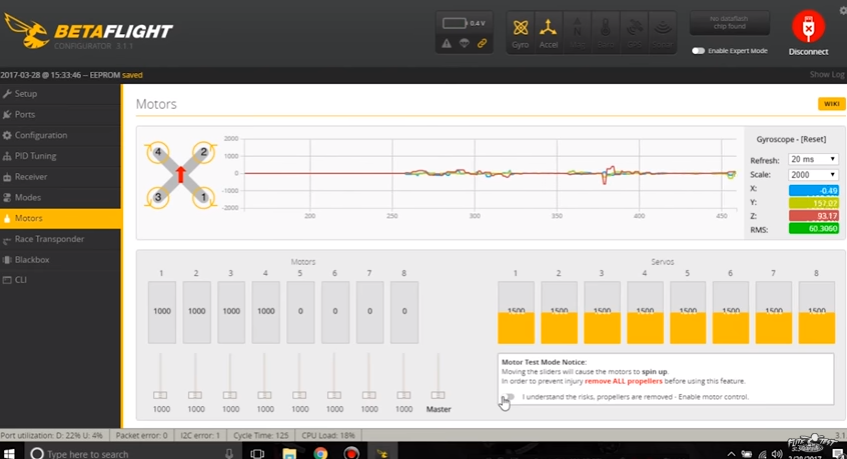
Configure the receiver, the board, and your overall flight settings using the Betaflight software. See video for setup tips!

Lastly calibrate your ESCs and find out which motor is not turning the correct way.
Once you have identified which motors do not work, proceed to use the BL Heli Suite software to fix it!

Put your props on, remember to do it right, check your worksheet or the video for clarification.

Go have fun! Get to know your Gremlin, and when you are ready, proceed to lesson 3 of the series to engineer and design your own.

This concludes your lesson 2
Your done!

